Introduction
React and its derivative frameworks, such as Refine, make building data-intensive front-end applications a breeze. When dealing with data-intensive applications such as admin panels, dashboards, and internal tools, it is necessary to set up a robust and effective notification system.
An effective notification system ensures timely notification whenever changes happen in the database. It keeps users informed about changes in the database, especially when dealing with distributed systems.
Any Refine project that uses a supported design system or component libraries, such as Material UI, Chakra UI, and Ant Design, comes with a customizable built-in notification provider. However, you can also build a custom notification system from the ground up or use one of the react toast libraries.
In the react ecosystem, there are several notification packages to choose from. React-toastify is one of the popular toast packages you can use to integrate a custom notification system in a React or Refine project. In this article, you will create a custom notification provider in a Refine application using react-toastify.

What we'll cover in this article:
- What is Refine
- What is react-toastify
- Notification providers in Refine
- Create a notification provider with react-toastify
What is Refine
Refine is a free, open-source, MIT-licensed React-based framework. Refine is a feature-packed library. It ships with features for user authentication, routing, internalization, and networking out of the box.
The built-in features make Refine a suitable package for building data-intensive front-end applications such as dashboards, admin panels, storefronts, and internal tools.
Additionally, the feature-rich Refine ecosystem makes it easy to bootstrap a Refine application and integrate popular design systems and component libraries such as Material UI, Chakra UI, and Ant design in your Refine project.
If you are not interested in the design systems and component libraries highlighted above, you can bootstrap a headless Refine application.
How to create a Refine app
When looking to start using Refine, you can bootstrap a Refine application using the Refine command line tool or the refine.new platform. The refine.dev platform makes it easy to create a new Refine project with all the necessary configurations in your browser.
Follow the steps below to bootstrap a new Refine application using the refine.new platform.
Navigate to the refine.new platform and log in using your GitHub or Google account.
After logging into the refine.new platform, create a new Refine project by following the steps or clicking the "Create New Project" button if you're on the
/projectspage. Be sure to use Vite. Select Headless as your UI framework, REST API as a back-end service, and no authentication provider.After creating a project in the previous step, build and download it to your local machine as a compressed Gzipped project. You need to give your project an appropriate name.
After downloading and extracting the compressed Gzipped project, open it in a text editor of your choice. Run one of the commands below to install the project dependencies.
npm install
- After successfully installing the project dependencies described in the previous step, run the command below on the terminal to preview the project. It will launch the development server on localhost on port 5173.
npm run dev
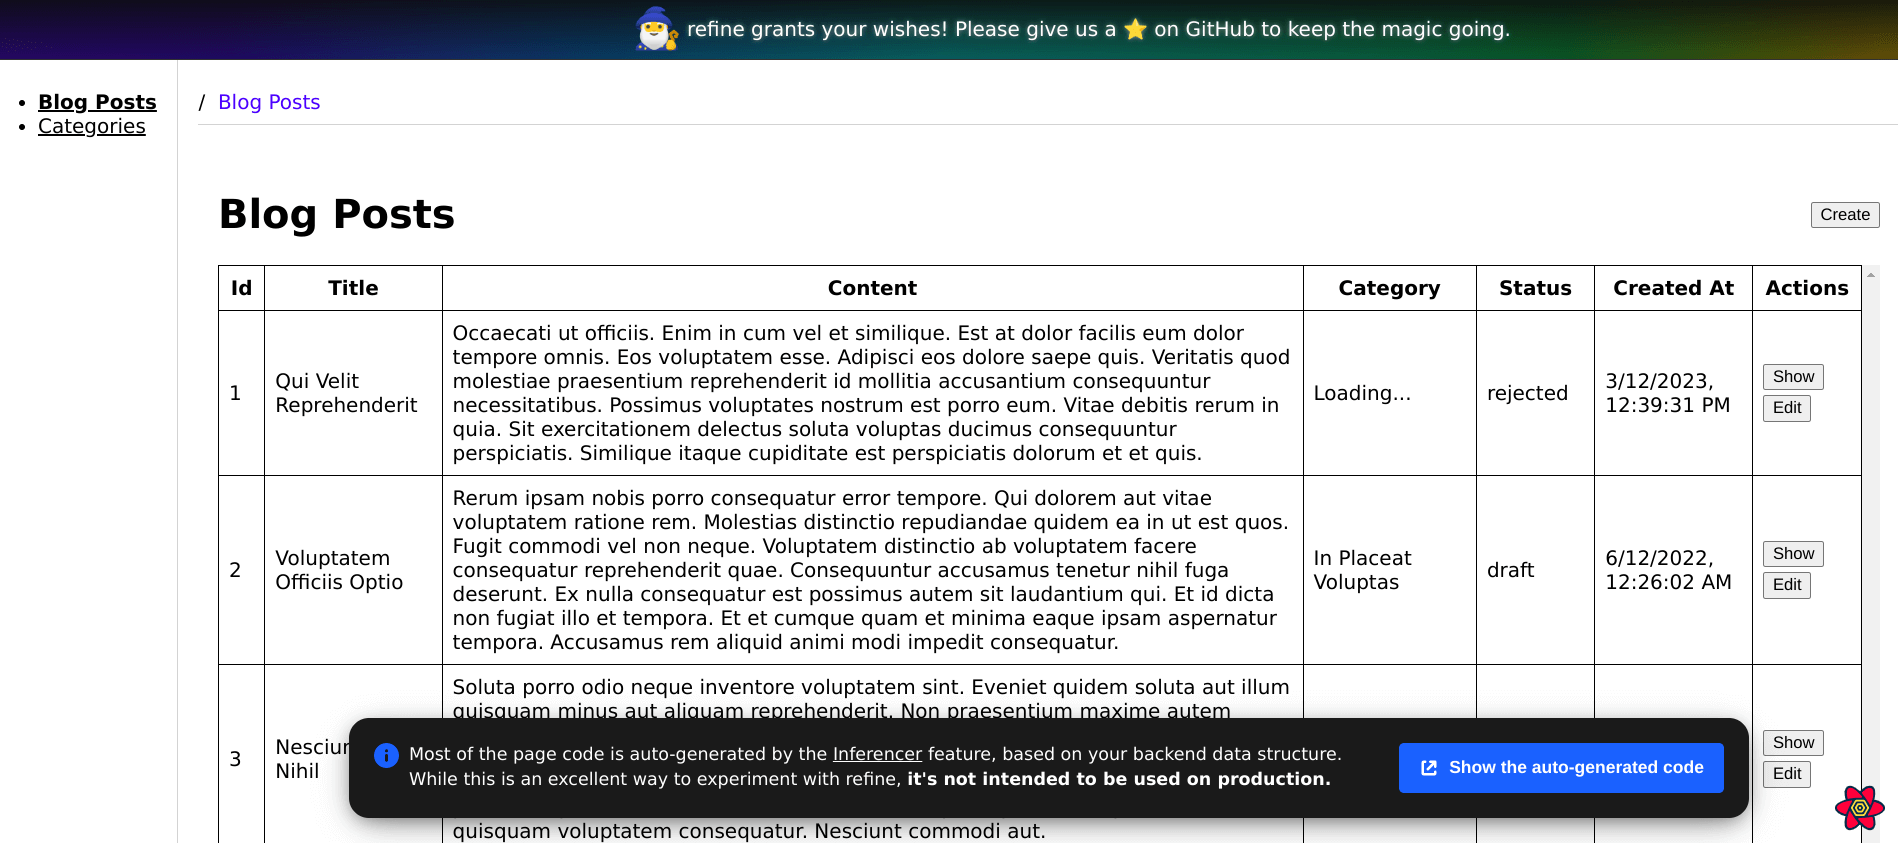
Your project should look like the image below.

The refine.new platform is one way of creating a Refine application. You can also use the Refine command line tool.
What is react-toastify
React-toastify is a free, open-source, MIT-licensed toast package you can use to provide temporary, unobtrusive, and auto-expiring notifications in your React or Refine application. You can use it with react or react-based frameworks like refine. React-toastify is a simple but powerful package.
The main building blocks of react-toastify you will interact with most are the ToastContainer component and the toast object. The ToastContainer component accepts several props for positioning the toast, specifying the theme, type of notification, and several other configuration options.
The code below shows some props you can pass to the ToastContainer component. For complete documentation of its props, read the react-toastify documentation.
<ToastContainer
  position="top-right"
  autoClose={5000}
  hideProgressBar={false}
  newestOnTop={false}
  closeOnClick
  rtl={false}
  pauseOnFocusLoss
  draggable
  pauseOnHover
  theme="light"
/>
You can trigger a notification by invoking the toast function. It takes the message and configuration object as arguments. Invoking toast with the arguments below will display a notification with the specified message at the top left.
toast("Successfully updated blog post", {
  position: "top-left",
  autoClose: 5000,
  hideProgressBar: false,
  closeOnClick: true,
  pauseOnHover: true,
  draggable: true,
  progress: undefined,
  theme: "light",
});
Some of the properties of the configuration object above are similar to the props we passed to the ToastContainer. The options you specify using the toast function supersede those you pass as props to the ToastContainer.
Notification providers in Refine
As hinted above, Refine offers out-of-the-box support for several design systems and UI libraries such as Material UI, Ant design, Mantine, and Chakra UI. If you use any of these design systems or component libraries, the Refine command line tool or the refine.dev platform will create a project with an out-of-the-box notification setup.
For a built-in notification provider, you need to import the notification provider and pass it as a prop to the Refine component like so:
import { useNotificationProvider } from "@refinedev/chakra";

return (
  <Refine
    //...
    notificationProvider={useNotificationProvider}
  />
);
The Refine notification feature is customizable. You can also pass a custom notification implementation as the value of the notificationProvider prop if the built-in notification provider of a design system or UI library doesn't meet your needs.
In Refine, a notification provider is an object with two properties. These properties are open and close, whose values are functions with the shapes below.
interface NotificationProvider {
  open: (params: OpenNotificationParams) => void;
  close: (key: string) => void;
}

interface OpenNotificationParams {
  key?: string;
  message: string;
  type: "success" | "error" | "progress";
  description?: string;
  cancelMutation?: () => void;
  undoableTimeout?: number;
}

const notificationProvider: NotificationProvider = {
  open: () => {},
  close: () => {},
};
You don't need to declare the NotificationProvider interface because you can import it from refine/core.
import { NotificationProvider } from "@refinedev/core";
In the sub-sections below, we will explore the open and close methods of the notification provider to understand how they work.
The open method
Refine invokes the open method of the notification provider when it wants to display a toast after the user performs an operation that requires notification, such as updating or deleting a record.
The open method takes an object with the shape below as an argument. As the code below illustrates, the OpenNotificationParams interface has several properties.
interface OpenNotificationParams {
  key?: string;
  message: string;
  type: "success" | "error" | "progress";
  description?: string;
  cancelMutation?: () => void;
  undoableTimeout?: number;
}
Though the object passed to the open method has several properties, it has two required properties, message and type. The other properties are optional.
The message property is the message to display on the notification. On the other hand, the type property describes the type of the notification. A Refine notification can be of type "success", "error" or "progress".
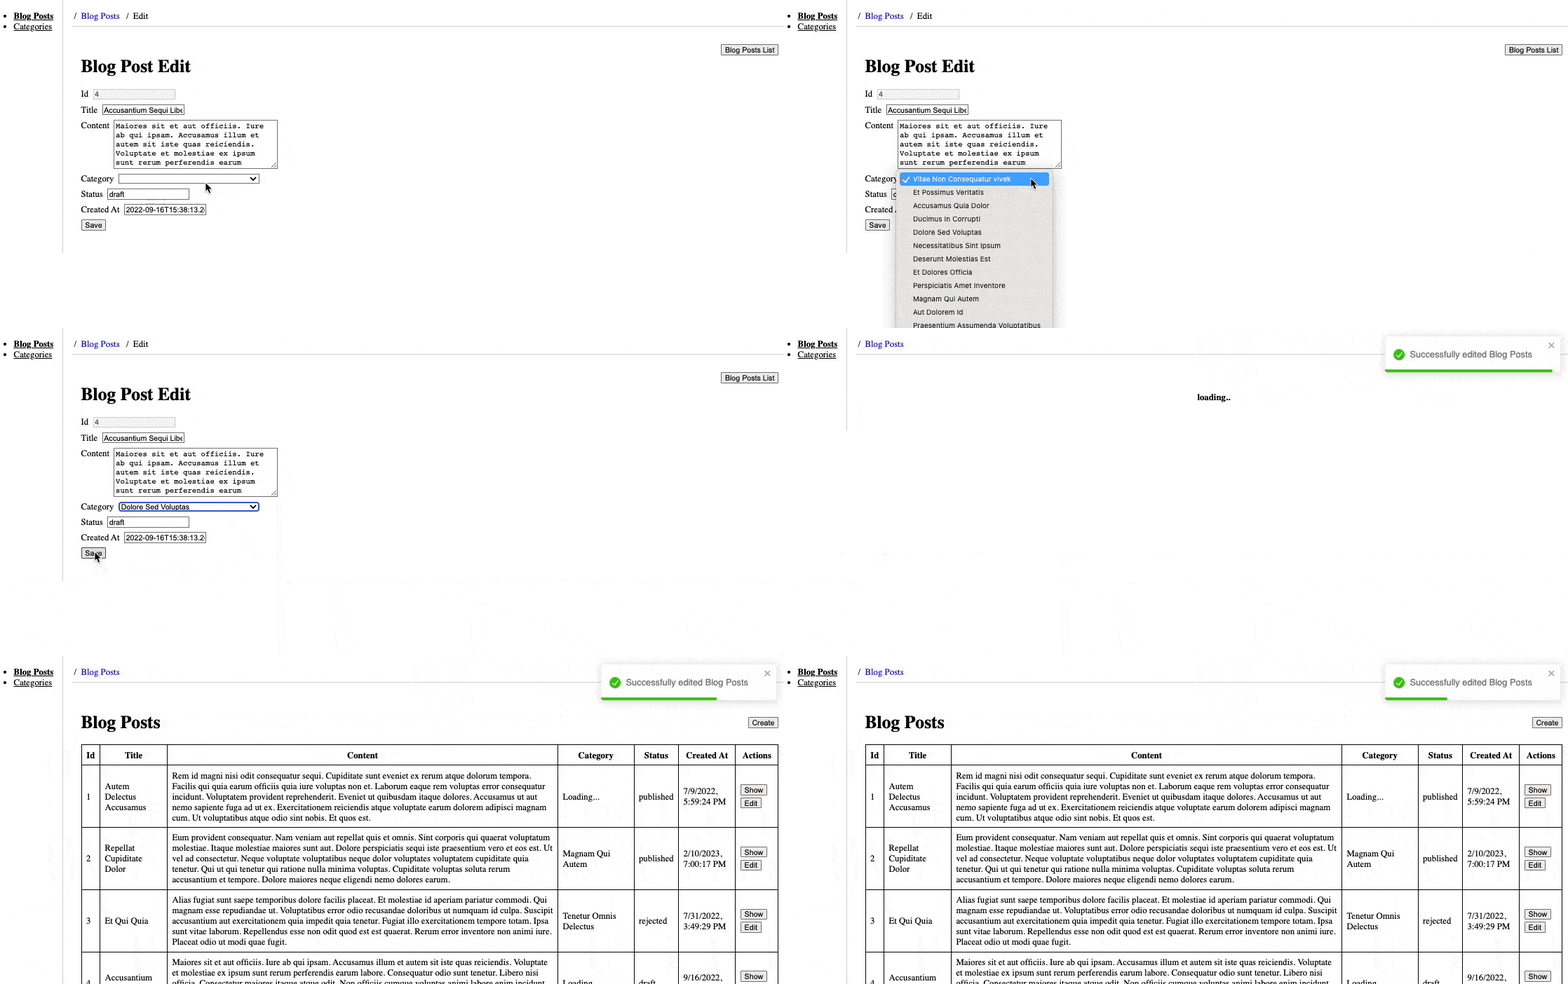
The screenshot below shows a success notification with the message "Successfully edited Blog Posts" that Refine displays after successfully editing a blog post.

Similarly, the screenshot below shows an error message with the text "Oops failed to update blog post" that Refine displays after failing to update a record.

The close method
Unlike the open method, Refine invokes the close method when closing a notification. It takes the notification key as an argument. You can then use the notification key to close the notification.
The useNotification hook
The section above describes the contents of a notification provider. You need the useNotification hook to trigger a notification from within a component. The useNotification hook returns the open and close methods of the notification provider highlighted above.
You can then invoke the open method to display the notification and the close method to close it. The code below illustrates the useNotification hook at a very basic level.
import { useNotification } from "@refinedev/core";

const { open, close } = useNotification();

// open notification
open?.({
  key: "notification-key",
  type: "success",
  message: "Successfully updated Blog Post",
  description: "This is a success message",
});

// close notification
close?.("notification-key");
Create a notification provider with react-toastify
In one of the sections above, we created a Refine application using the refine.new platform. In this section, you will learn to create a custom notification provider using react-toastify. Follow the steps below.
Step 1 — Install react-toastify
Our goal in this article is to create a custom notification system using react-toastify. Open the Refine project you created above in your favorite text editor, and depending on your package manager, use one of the commands below to install react-toastify from the NPM package registry.
npm install react-toastify
Step 2 — Set up the notification provider
As explained above, the <Refine> component is one of the main components of a Refine application. You will almost always use it to configure the settings for your application.
Let's start by creating a dedicated file for our notification provider. Inside the src directory, create a new directory and name it providers. Inside the providers directory, create the notificationProvider.tsx file. Copy and paste the code below into it.
import React from "react";
import { NotificationProvider } from "@refinedev/core";
import { toast } from "react-toastify";

export const notificationProvider: NotificationProvider = {
  open: ({ key, message, type, undoableTimeout, cancelMutation }) => {
    if (toast.isActive(key as React.ReactText)) {
      toast.update(key as React.ReactText, {
        render: message,
        type: "default",
      });

      return;
    }

    toast(message, {
      toastId: key,
      type: "default",
    });
  },

  close: (key: any) => toast.dismiss(key),
};
The toast.isActive function takes the notification key as an argument. It returns true if the notification is active and false otherwise.
In the code above, we first checked whether the notification is active using toast.isActive. If there is an active toast with the specified key, we update it instead of creating a new one. If there is no active notification with the specified key, we create a new toast.
Similarly, you use the toast.dismiss function to dismiss an open notification. The toast.dismiss function takes the notification key as an argument. The code above is a simple notification provider setup to get us up and running. We will add more functionality later.
We need to import the above notification provider into the App.tsx file and pass it to the Refine component as the value of the notificationProvider prop. Modify the App.tsx file to include the following code.
...
import { ToastContainer } from "react-toastify";
import { notificationProvider } from "./providers/notificationProvider";
import "react-toastify/dist/ReactToastify.min.css";


function App() {
  ...
  return (
    <BrowserRouter>
        <Refine
          ...
          notificationProvider={useNotificationProvider}
          i18nProvider={i18nProvider}
          ...
        >
          <Routes>
            <Route
              element={
                <Layout>
                  <Outlet />
                  <ToastContainer />
                </Layout>
              }
            >
            ...
            </Route>
          </Routes>
          <UnsavedChangesNotifier />
        </Refine>
    </BrowserRouter>
  );
}
Your notification provider setup is now complete. When you edit or create a new blog post, Refine will display a notification.
Step 3 — Create custom Undoable notification component
You can apply mutations or updates in Refine in three modes. These three modes are the pessimistic, optimistic, and undoable modes. You can set the notification mode of your Refine application using the options prop of the Refine component.
const App: React.FC = () => {
  return (
    <Refine
        ...
        options={{ mutationMode: "optimistic" }}
    />
    );
};
In the pessimistic mutation mode, Refine applies mutation immediately. It then updates the UI and redirects after mutating successfully. The pessimistic mode is the default.
Optimistic mode is where Refine applies the mutation locally and immediately updates UI and redirects irrespective of whether the mutation is successful or not. If the mutation fails, it updates the UI with an appropriate notification message.
With the undoable mutation mode, Refine applies the mutation locally and immediately redirects and updates the UI as if the mutation is successful. It then waits for a customizable timeout before applying the mutation. During the timeout, you can cancel the mutation and revert the UI.
Therefore, when working with Refine in the undoable mutation mode, you display a notification informing the user of the time left and a button to cancel the mutation. We need a custom component to display the countdown and button for canceling the mutation.
In the src/component directory, create a new directory and name it undoable-notification. In the undoable-notification directory you have just created, create the index.tsx file. Copy and paste the code below into it.
type UndoableNotification = {
  message: string;
  cancelMutation?: () => void;
  closeToast?: () => void;
};

export const UndoableNotification: React.FC<UndoableNotification> = ({ closeToast, cancelMutation, message }) => {
  return (
    <div>
      <p>{message}</p>
      <button
        onClick={() => {
          cancelMutation?.();
          closeToast?.();
        }}
      >
        Undo
      </button>
    </div>
  );
};
In the component above, we display a message to indicate the time left and a button to cancel the mutation and close the notification.
When the mutation mode is undoable, Refine will invoke the open function and sets the notification type to "progress". It will also set the timeout as the value of the undoableTimeout property and the cancelMutation function for canceling the mutation within the timeout.
Every second, Refine will decrease the value of undoableTimeout by 1 until its value reaches 0.
Import the UndoableNotification component you created above into the src/providers/notificationProvider.tsx file. Add the following changes to the notification provider. Pay attention to the open method because its body has changed. It will display a custom component when the Refine mutation mode is undoable.
import React from "react";
import { NotificationProvider } from "@refinedev/core";
import { toast } from "react-toastify";
import { UndoableNotification } from "../components/undoable-notification";

export const notificationProvider: NotificationProvider = {
  open: ({ key, message, type, undoableTimeout, cancelMutation }) => {
    if (type === "progress") {
      if (toast.isActive(key as React.ReactText)) {
        toast.update(key as React.ReactText, {
          progress: undoableTimeout && (undoableTimeout / 10) * 2,
          render: <UndoableNotification message={message} cancelMutation={cancelMutation} />,
          type: "default",
        });

        return;
      }

      toast(<UndoableNotification message={message} cancelMutation={cancelMutation} />, {
        toastId: key,
        updateId: key,
        closeOnClick: false,
        closeButton: false,
        autoClose: false,
        progress: undoableTimeout && (undoableTimeout / 10) * 2,
      });

      return;
    }

    if (toast.isActive(key as React.ReactText)) {
      toast.update(key as React.ReactText, {
        render: message,
        closeButton: true,
        autoClose: 5000,
        type,
      });

      return;
    }

    toast(message, {
      toastId: key,
      type,
    });
  },
  close: (key) => toast.dismiss(key),
};
Step 4 — Preview notification
You can preview the notification by editing a record. Refine will make updates and display a notification. You can also change the mutation mode of the application to undoable using the options prop of the Refine component to display the custom component above.
Conclusion
Having a notification system is inevitable when building complex distributed systems. It notifies users when an event or changes occur in the database.
Refine comes with a robust and customizable notification system when you use one of the supported UI or design systems like Material UI, Chakra UI, and Mantine.
Refine gives you the flexibility to build a custom notification provider using a notification library like react-toastify if the built-in notification system of the supported UI or design system doesn't meet your needs.
Live CodeSandbox Example
npm create refine-app@latest -- --example blog-react-toastify


